Automatic dimension measurement boosts quality at volume turned-parts manufacturer.
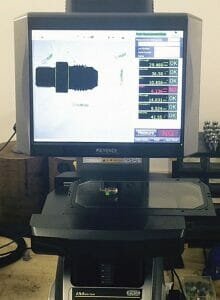
BMI Engineering, one of the UK´s leading high volume turned-parts manufacturers, has upgraded its quality department with the addition of an IM Series image dimension measuring system from Keyence. The system has not only saved time spent using laborious shadowgraph technology, but has also negated any potential for customer disputes regarding dimension measurement.
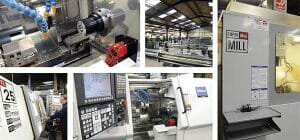
Based at Halesowen in the West Midlands, BMI Engineering is today a rare breed of UK manufacturer. In an era when most volume machining takes place in low cost economies in the Far East, BMI is bucking the trend. With 26 multi-spindle automatic lathes on site and five CNC turning centres, the company is a UK leader in the supply of repeat turned parts, predominantly to the automotive sector, but also to industries such as gas fitting, heating, plumbing, railway and agriculture.
»Acquiring the Keyence IM was part of moving our quality effort forward,» states Chris Peare, Quality Manager at BMI Engineering. »We manufacture turned parts for numerous automotive tier one supply chain companies and one or two were nudging us in the direction of more automatic measurement capability.»
BMI, a 30-employee company first established in 1975, was previously using time-consuming shadowgraph technology to measure its parts, a process not befitting the fast-paced markets that the company served.
»If we measure a turned part on the IM, and it´s correct, the customer has no come-back whatsoever,» says Mr Peare. »Each measurement is recorded and documented, and can be repeated time after time. Furthermore, it´s no problem if the customer wants full PPAP (production part approval process), CpK or SPC. We simply print off the required graphs and information ready to send with the other paperwork metrics. All of this is invaluable to a company such as ours as we export around 65% of our output.»
When mulling over the idea of an image measurement system, Mr Peare received, by chance, a mailshot regarding the Keyence IM Series. After expressing his interest, Keyence visited BMI and performed a demonstration. Suitably impressed, the IM was installed in September 2013.
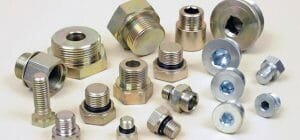
 BMI works to typical tolerances of ±0.025 mm and performs random sample inspections. Turned automotive parts produced on the company´s multi-spindle automatics, along with other components such as plugs (headed and recessed), pipe fittings and special fasteners, measure up to 57 mm diameter, while parts produced on the turning centres can be larger, up to 80 mm. Maximum length is around 120 mm. According to Mr Peare, long parts are no problem for the IM Series thanks to Keyence´s image stitching technology.
Typical features on parts such as plug-type adaptors and fluid fittings include undercuts and threads. The measurement of threads is particularly tricky for many technologies and, as a result, most machine shops prefer to use gauges. However, this is not the case where a Keyence IM Series is installed.
»We can checks thread flanks and pitches – metric and imperial – with no problem whatsoever,» says Mr Peare. »In fact, we even use the IM to check our thread gauges.»
The ability to load multiple parts on the IM Series is also seen as a huge advantage to this ISO9001 accredited business, where many of the turned components are relatively small. It´s not unusual for the quality department to load up to six parts simultaneously on the IM. Needless to say, this presents considerable time savings.
 The IM Series image dimension measurement system reliably measures features almost instantaneously. Simply place a target on the stage and press the
button. Up to 99 geometries are measured in a matter of seconds with a repeatability of ±1 micron. Targets are found and measured regardless of their position or orientation, and there is no risk of measurements being affected by variations in operator skill levels. Thanks to the Keyence iPASS shape detection method, the system determines the position and angle of targets, making measurements fully automatic.
Beyond the quality department, the benefits of the Keyence IM extend to the shop floor. For instance, if a machine setter is struggling with a particular thread, the IM will reveal in an instant what is wrong so that the variation can be quickly identified on the multi-spindle automatic. Compare this to performing laborious point-to-point measurement on a shadowgraph, and the savings in downtime are clear to see.
»Since it was installed the IM Series has been kept extremely busy, there´s always someone on the machine,» concludes Mr Peare. »Thankfully, it´s been extremely reliable and helped take our measurement capability to the next level.»
Keyence UK
Avebury House, 219-225 Avebury Boulevard Milton Keynes, MK9 1AU United Kingdom Adnell Masuku
Phone: +44 (0)1908 696900
Fax: +44 (0)1908 696777
[email protected]

