Specialist engineering solutions provider Presspahn built a reputation for supplying a range of industries with materials and components for electrical insulation, thermal insulation and mica-based insulation. The company has remained ahead of the market by adopting modern manufacturing techniques driven by innovation, precision and consistency backed by low costs and minimal lead times.Inspection is a key part of Presspahn’s stringent quality control systems for its manufactured products but the company found that using conventional manual technology meant allocating a significant amount of time to inspecting a wide range of its complex parts.
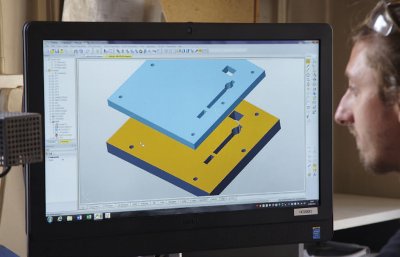
As demand from customers increased for Presspahn’s products, it became clear that it was no longer feasible to rely on traditional methods of measurement such as digital callipers and manual shadowgraphs. For example, checking some dimensions could mean having to plot points on a CAD system to determine features that it was not possible to measure directly. This presented a particular challenge for parts with repeating features that needed to be plotted each time, not least because Presspahn found itself having to invest huge amounts of time on inspection while simultaneously reducing the level of detail that was being checked at intermediate inspections.
Furthermore, it wasn’t unusual for a first article inspection (FAI) to take over an hour to complete. The company also found that increasing numbers of customers were looking to have products checked via such inspection methods as initial sample inspection reporting (ISIR), AS9102 FAI (sometimes called production process verification) and the production part approval process (PPAP) which is favoured by supply chains to the automotive industry. Customers were also demanding detailed inspection reports as well as statistical analysis of parts.
The solution
Presspahn had often considered taking advantage of the advanced inspection technology developed by Keyence, a company with a global reputation for the highest standards of part measurement. Presspahn had used some Keyence measurement devices in the past and had been impressed by the compact design of the products as well as their ease of use and the high-quality statistical reports that could be generated.
Keyence is recognised as an innovative leader in the development and manufacture of industrial automation and inspection equipment, including code readers, laser markers, machine vision systems, measuring systems, microscopes, sensors and static eliminators.
Presspahn chose Keyence’s latest addition to its Instant Measurement System series and found that the biggest benefit was the ability to save time, with inspections that would previously take over an hour capable of being done in under 10 seconds – and that included printing the report.

Thanks to the Keyence IM-Series Image Dimension Measurement System, it became possible to carry out the full inspection of every component in less time than it would have previously taken to inspect just one. Also, thanks to the statistical reports provided by the Keyence device, Presspahn inspectors were able quickly to raise any concerns and discuss them with customers. This could lead to concessions being requested or drawing changes made but for the first time the process was able to take place without having to ship parts to customers to carry out their own inspection.
Features of this new measurement system include an automatic measurement function that enables all settings to be completed with one click, the ability to record all measurement results and create reports automatically, and an intuitive interface that involves simply placing the part on the measurement stage and pressing the ‘Measure’ button. Significantly, no measurement expertise is needed to operate the device, with measurement points automatically identified, consistent values delivered through automatic focal adjustment, and different parts identified and measured without having to change profiles.
Other features not available elsewhere include large diameter telecentric lenses, a programmable ring illumination unit, a light probe unit for measuring at specific heights and a large, high-speed/high-precision stage that measures volumes up to 300mm x 200mm (and the field of view at three times the speed of conventional systems).
Matthew Pinder, Managing Director at Presspahn, says: “The Keyence IM-7020 has made a huge difference to the way that we can now meet the requirements of our customers. A combination of speed, accuracy, ease of use and immediate access to inspection data means that we can shorten timescales spent checking parts and not have to involve the customer in the inspection process.”
Matthew adds: “As well as supplying us with its advanced and sophisticated inspection equipment, Keyence has provided us with an excellent level of technical support which ensured we were able to train our staff quickly in order to make the best use of this unique piece of kit.”


