A leading UK manufacturer of bespoke bearings and one of the biggest stockholders and distributers of plain bearings and sintered parts in Europe, Abingdon-based Bowman International has significantly upgraded the inspection of its products with the purchase of a new coordinate measuring machine (CMM) built by LK Metrology, Castle Donington. It is Bowman’s latest investment after decades of continuous growth, mainly organic but also through strategic acquisitions. The company has seen turnover generated from domestic and worldwide markets increase significantly over recent years, according to managing director Paul Mitchell, who joined the organisation some 15 years ago.
Bowman continues to invest in technology and adopt a quality-first philosophy. Part of that progression has entailed the introduction of high precision, safety critical split bearings delivered to the automotive, aviation, defence, marine and rail sectors, amongst others. The recent acquisition of bearings and housings manufacturer Criptic Arvis, near Leicester, has complemented Bowman’s established production facility in Kingswinford, boosting the production and sales of ISO class 7 special bearings, which account for a significant element of sales.
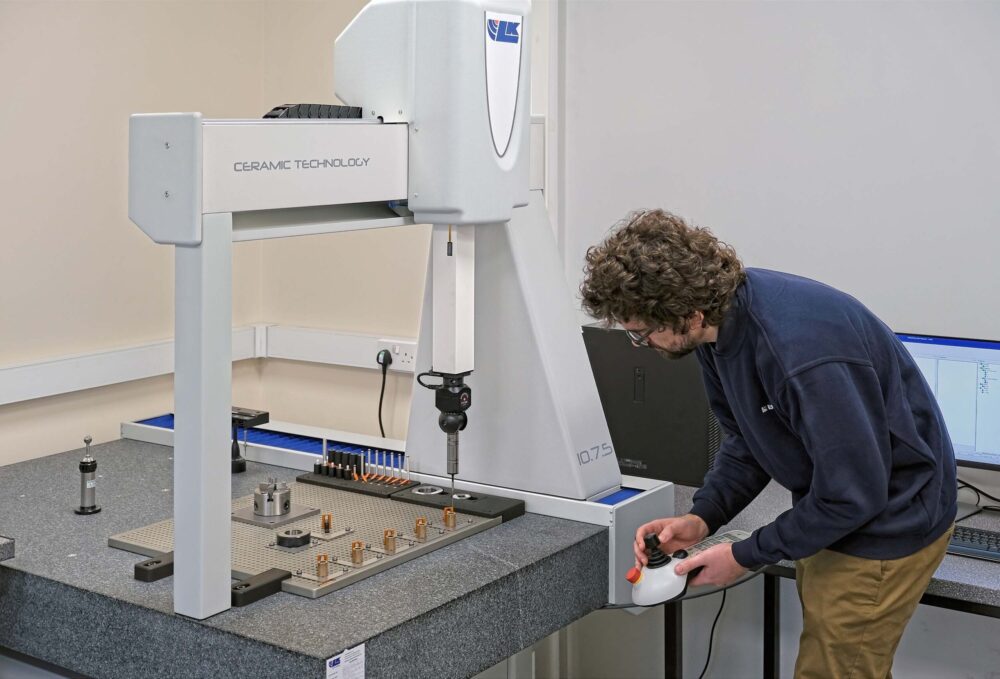
Unsurprisingly, the amount of work in Abingdon being put onto the previous CMM purchased in 2016 was increasing inexorably. However, its level of reliability coupled with a significant increase in product distribution was proving challenging. The equipment was also slow in operation and had basic, time-consuming reporting requiring results to be printed out and transcribed to an Excel spreadsheet. After considering potential replacement CMMs from five different sources, Mr Mitchell and Bowman’s quality manager Owen White chose the LK option, an Altera 10.7.5, after visiting the manufacturer’s factory and witnessing metrology trials carried out on sample bearings.
Standard, bought-in products generally need only first article inspection before a batch is delivered to a customer, so the daily workload on the CMM is relatively light. Conversely, bespoke bearings produced in-house normally require five to be checked to ensure consistency. This single business area therefore consumes a significant proportion of CMM capacity. Sometimes when carrying out capability studies, 25 to 50 components have to be measured. In one exceptional case, a customer requested 100% inspection of 100 Oilite safety-critical, self-lubricating bronze bearings, which are exclusively marketed in the UK and Europe by Bowman.
In view of the high accuracies involved, by the time the Altera arrived in early April 2024 the quality control room had been refurbished by lowering the ceiling and installing a new air conditioning unit to enable the temperature to be controlled reliably to 20 ± 1°C. The CMM’s accuracy is verified every morning, rather than at the more usual frequency of once per week, and then checked using a UKAS calibrated ring gauge. The gauge and each batch of five manufactured bearing samples are positioned precisely on the granite table using L-shaped, laser-cut retainers attached to a base plate having an array of drilled and tapped holes. Attached also to the plate is a lathe chuck specially adapted in Abingdon to hold washers and other awkwardly-shaped items securely for probing. To the rear is a six-port probe rack that allows parts to be inspected using multiple probes in a single, automatic cycle. Components to benefit from being measured in this way include tall bearings and complex, 3D-printed plastic components, such as polyamide 11 bearing cages and seals for in-house-designed and patented split bearings.
Unlike on the old CMM, which only used touch-trigger probes, a notable difference with the new LK inspection platform is that the manufacturer supplied it with an SP25M scanning probe in addition to a variety of conventional probes, all for deployment on a PH10M Plus motorised indexing head. To enable tactile scanning as well as data analysis and reporting, LK supplied its own CAMIO 2024 R1 multi-sensor software and 3-axis scanning module interfaced to its NMC300 controller.
As Mr White pointed out, “On one of our 20 mm diameter bearings, for example, we used to measure 12 points around the top and bottom of the ID. We now capture more than 100 points in a shorter time, which gives us a much better idea of not only the accuracy of the part but also the overall form of the bore.”
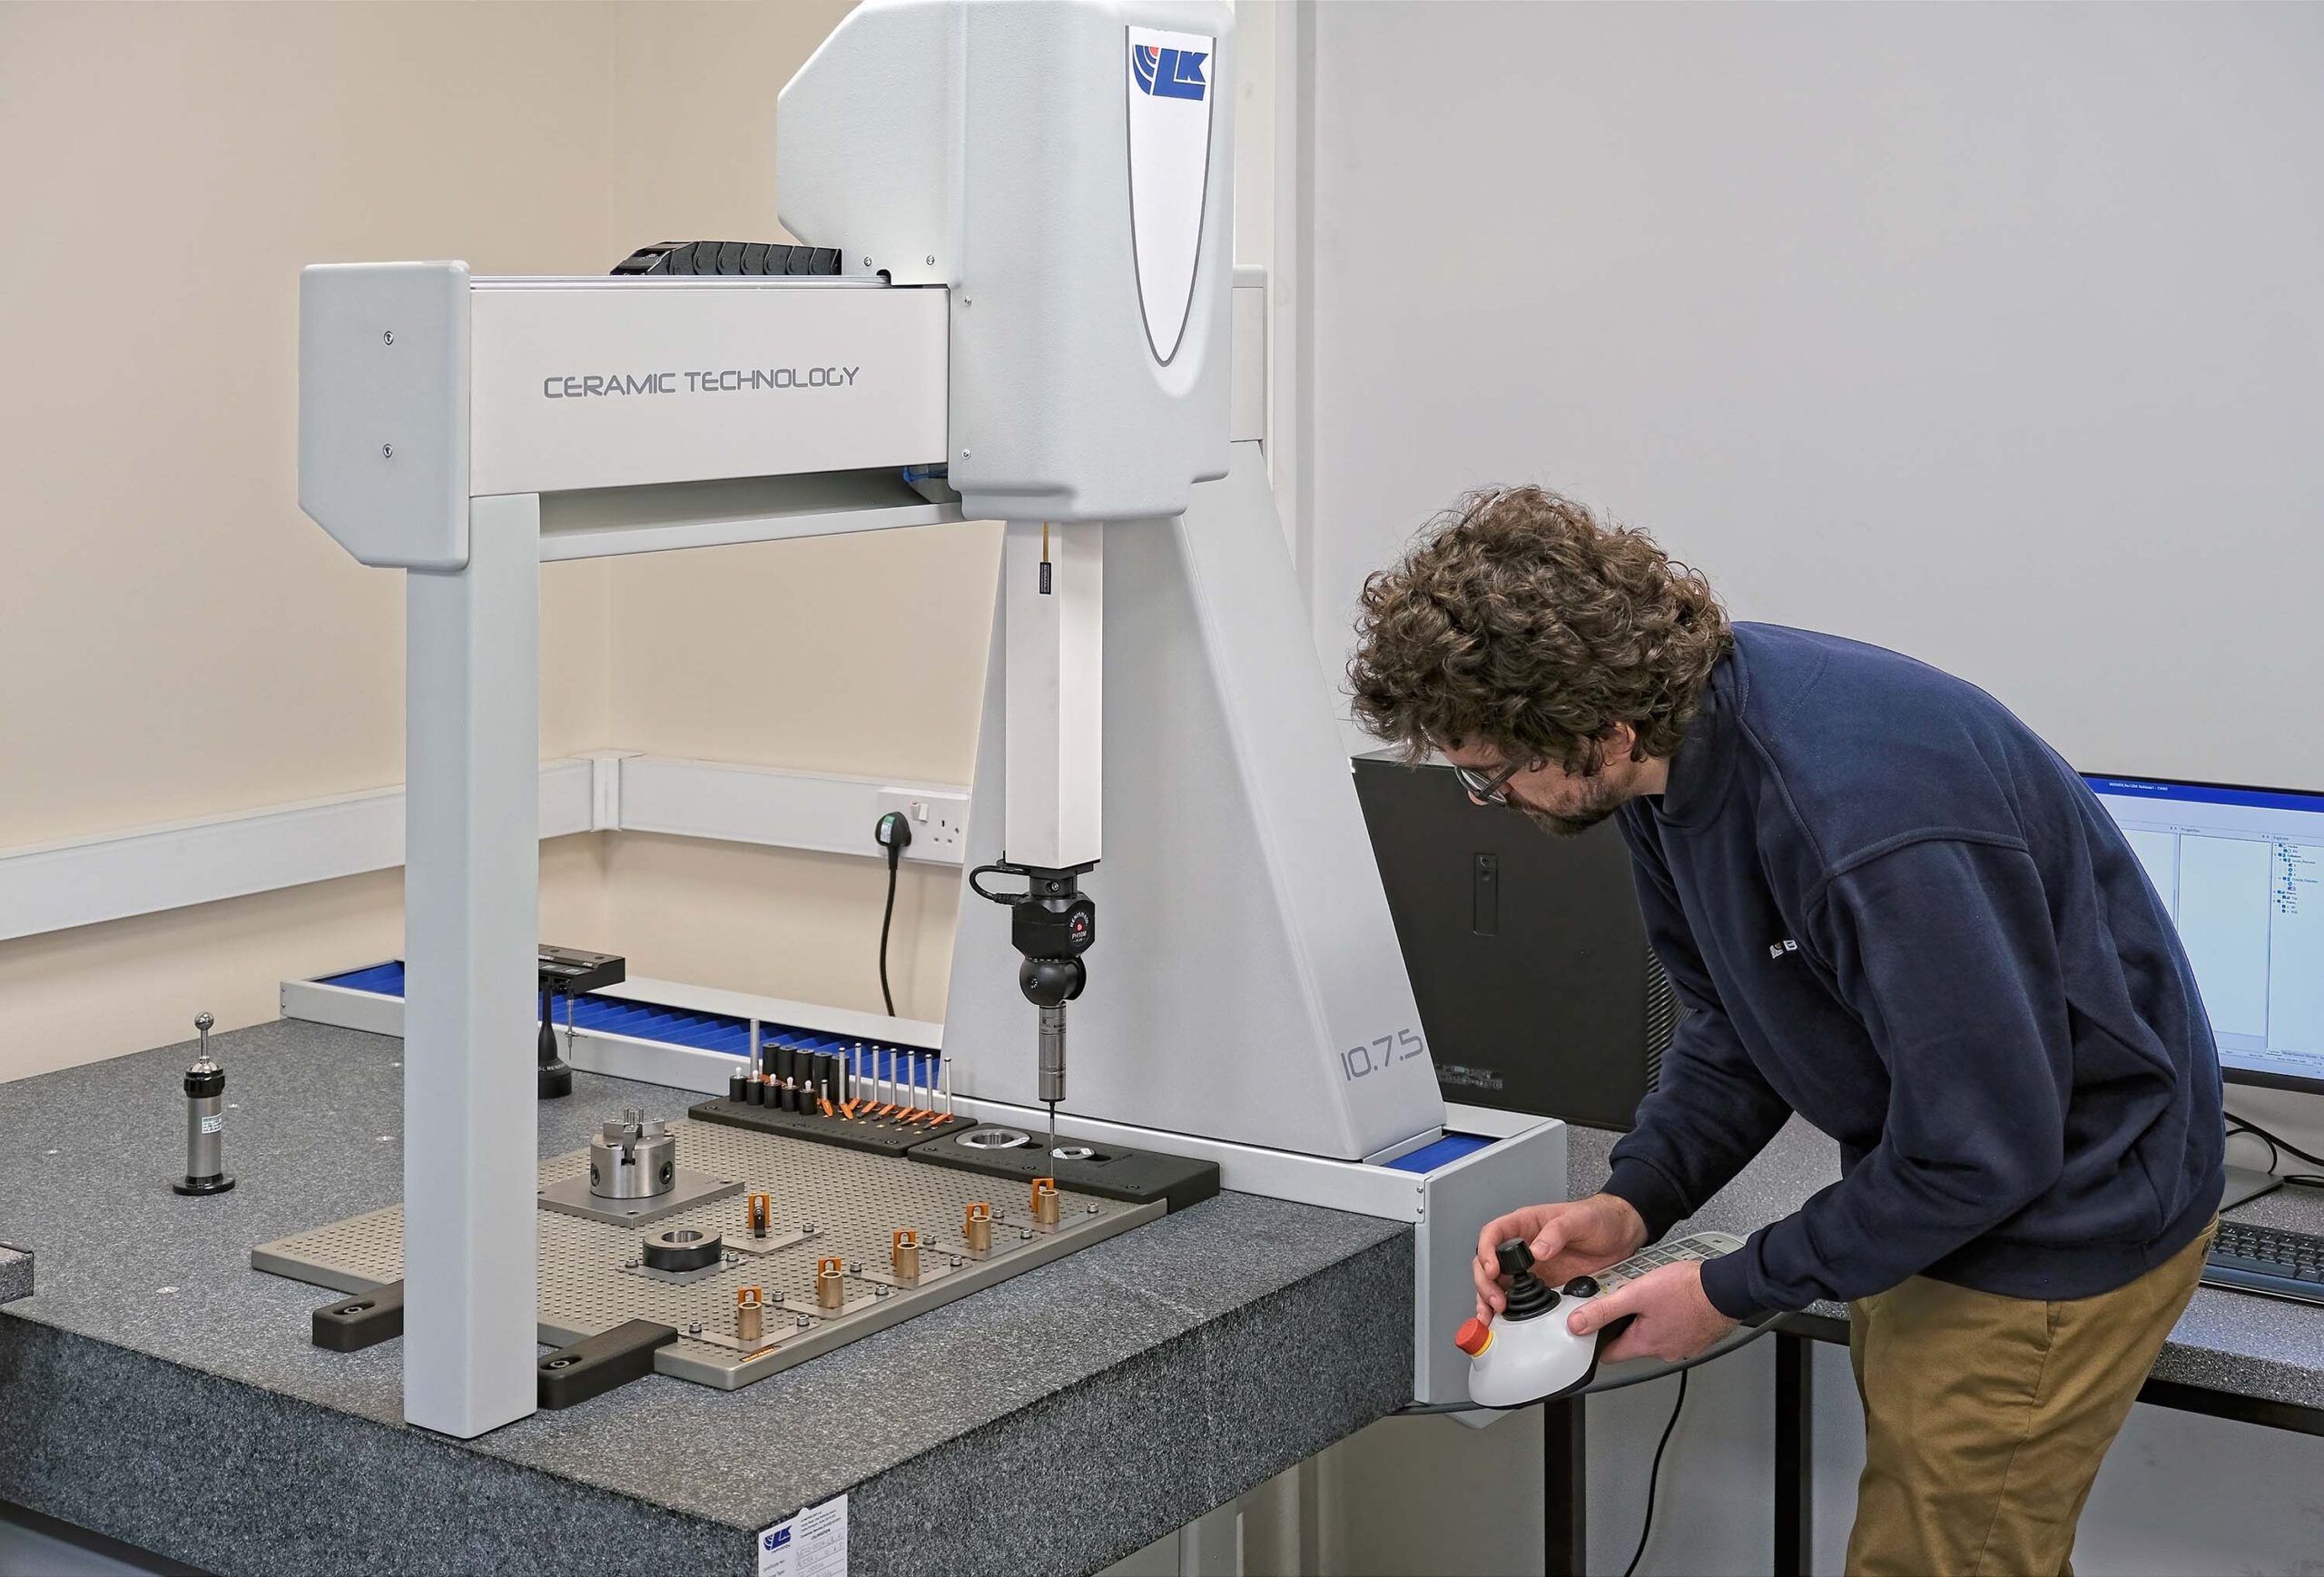
He added that with the multiple sensing capability provided by the indexing head and software, it would be an easy matter to incorporate a laser scanning sensor into the metrology system. That will be advantageous if there is a future requirement to inspect complex parts made in two Hewlett-Packard plastic 3D printing machines on site. Installed in 2018, they regularly provide an additive manufacturing bureau service in addition to building parts for internal use.
Overall, quality control activities at Bowman have been accelerated right along the process chain, whether it is for ID/OD checking, or for verification of concentricity, circularity, flatness or feature position. Programming in CAMIO takes half the time at between 15 and 20 minutes compared with when the previous CMM was in use and measuring cycles at around five to six minutes are similarly shorter. The LK software also cuts the time for producing inspection reports for customers to typically half an hour, faster by at least a factor of two and up to four times.
Mr White also shared his positive experience undergoing one-to-one training in Castle Donington, which was carried out while the CMM was being installed in Abingdon. Not only was the learning environment excellent, but the individualised nature of the instruction allowed a focus on measuring principles as they apply to bearings, rather than involving general metrology of marginal utility to him that class training would have entailed. The standard of knowledge he gained made it easy for him, on his return to Bowman, to train another member of staff. If either of them comes across an unfamiliar aspect in preparing a job for inspection or executing a cycle, the helpdesk at LK is very good at providing speedy support.
Mr Mitchell concluded, “We have thousands of product lines and pride ourselves on our comprehensive stock availability, innovation, technical superiority and next-day delivery. The ability of the LK CMM to improve the speed and quality control of our bearings is hugely important to us.
“The fact that the supplier is a British manufacturer was a real plus point, as the Altera was available ex-stock and could be delivered quickly. The existence of LK’s factory in the UK also means that a high level of local expertise and service backup is close at hand. After using the new CMM regularly for many months, we feel that our purchase decision has been completely vindicated.”

